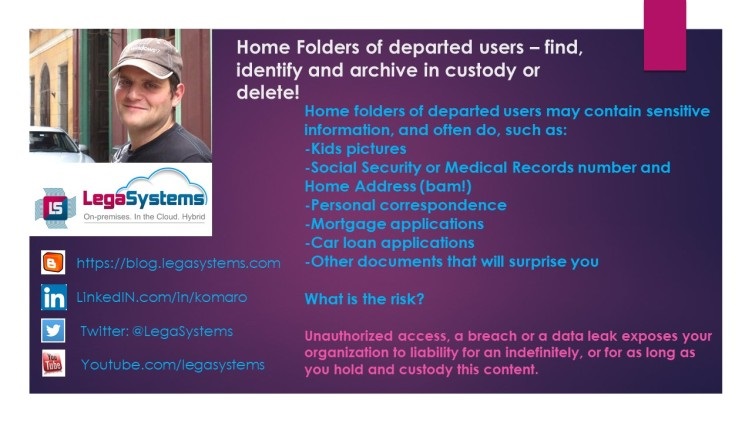
Home Folders of departed users – find, identify and archive in custody or delete!
Home folders of departed users may contain sensitive information, and often do, such as:
-Kids pictures
-Social Security or Medical Records number and Home Address (bam!)
-Personal correspondence
-Mortgage applications
-Car loan applications
-Other documents that will surprise you
What risk are you takin on by keeping this content on your file systems?
Unauthorized access, a breach or a data leak exposes your organization to liability for an indefinite amount of time, or as long as you hold and custody this content.
It is recommended to clean up the home folder of a user who has been removed from Active Directory in a Windows domain environment. This is important for security reasons, as it helps to ensure that the data of the former user is not accessible to any unauthorized users. Once the user is deleted from Active Directory, the user object holding permissions will be replaced with a SID. You will likely have to figure out who the folder belongs to, take ownership and archive or even better purge the content. As long as you host this information on your computer system, it is a RISK for your organization, no matter how long ago this person has left.
Additionally, cleaning up the home folder helps to free up disk space on the server, which can be important in environments with limited storage capacity.
How to find Active Directory users’ home folders and remove departed users home folders
Cleanup Step 1) You can use the Active Directory PowerShell module to extract users’ account name and home folder location. Here is an example PowerShell command that you can use to extract this information:
Get-ADUser -Filter * -Properties HomeDirectory | Select-Object SamAccountName, HomeDirectory >C:\temp\homefolders.csv
This command exports existing users home folders into a CSV file, directory C:\temp will need to be present.
You will need to install Active Directory PowerShell module if you don’t have it installed already in order to un this command.
To install the Active Directory PowerShell module, follow these steps:
Cleanup Step 2) You need this step only if you do not yet have Active Directory Powershell module installed. Open PowerShell as an administrator.
Type the following command and press Enter to install the RSAT tools:
Get-WindowsCapability -Name RSAT* | Add-WindowsCapability –OnlineType the following command and press Enter to install the Active Directory PowerShell module:
Install-Module -Name ActiveDirectoryIf prompted, type Y to install the module from the PowerShell Gallery.
Once the installation is complete, you can import the Active Directory PowerShell module by running the following command:
Import-Module ActiveDirectoryThis will allow you to use the cmdlets and functions provided by the Active Directory PowerShell module.
Please note that you will need to have administrative privileges on the computer and an active internet connection to install the module from the PowerShell Gallery. Additionally, the installation process may vary slightly depending on your version of Windows and PowerShell.
The above Get-ADUser command retrieves all AD user objects using the -Filter parameter and the * wildcard character. The -Properties parameter is used to specify that we want to retrieve the HomeDirectory property for each user object. Finally, we use the Select-Object cmdlet to select only the SamAccountName and HomeDirectory properties for each user object.
This command will output a table that includes the SamAccountName (account name) and HomeDirectory (home folder location) for each user object in AD.
Please note that you will need to have the Active Directory PowerShell module installed and have the appropriate permissions to access AD in order to run this command. Instructions above.
Save the exported CSV file, you will need to determine which accounts are no longer active so that you can remove their home folder directories from the file server where the share is hosted.
Home Folder Cleanup
Cleanup Step 3)In this script, replace departed_user with the username of the user whose home folder you want to delete, and \\servername\homefolders with the path to the directory that contains the home folders. The -Recurse and -Force parameters ensure that all files and subdirectories within the user’s home folder are also deleted.
# Set the username of the departed user
$username = "departed_user"


# Set the path to the home folder directory
$homefolderpath = "\\servername\homefolders"


# Set the path to the user's home folder
$userhomefolder = "$homefolderpath\$username"


# Delete the user's home folder, be careful with this one, test on one user account first, before launching the batch
Remove-Item $userhomefolder -Recurse -Force
Please note that this script permanently deletes the user’s home folder and its contents, so make sure you have a backup of any necessary data before running it. Additionally, ensure that you have the necessary permissions to delete the user’s home fold
What if the user account is gone from active directory but the home folder may still be around?
If the user account has been deleted from Active Directory but the home folder still exists, it is important to determine if the home folder contains any data that needs to be retained before deleting it.
One approach is to check the permissions on the home folder to see if the user account was the only one with access to the folder. If there are other users or groups listed with permissions to the folder, you may need to investigate further to determine if any of those users or groups require access to the data in the folder.
To check the permissions on the home folder, follow these steps:
Navigate to the directory where the home folders are stored.
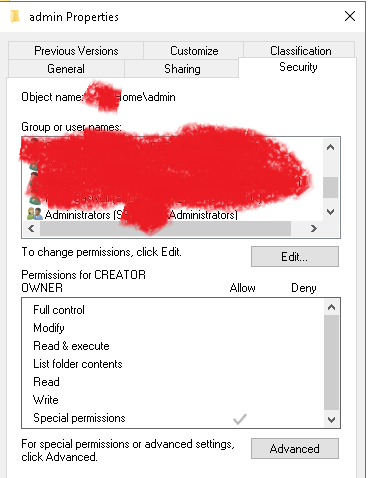
Right-click on the user’s home folder and select Properties.
Click on the Security tab.
Check the list of Group or user names to see if the user account is still listed. If it is, remove it.
Check if any other users or groups are listed, and determine if they require access to the data in the folder. If not, remove their permissions as well. It is normal for administrator accounts to have permissions to the home folder as well as the system account. This is done in order to control permissions and assign as appropriate by admins.
How to determine which home folders for departed users can be deleted?
Cleanup Step 4) To clean up a user’s home folder after they have been removed from Active Directory, you can either manually delete the folder or use a script or tool to automate the process. It’s important to ensure that any necessary data is backed up before the folder is deleted.
Once you have determined that the home folder contains no important data or has been appropriately backed up, you can delete it using the appropriate method. This may involve using PowerShell, the Windows File Explorer, or another tool depending on your environment and specific requirements.
You can also compare the user accounts from Step 1 in this document to an output of a home folder location. You can grab the home folder location from the user account properties in Active Directory.
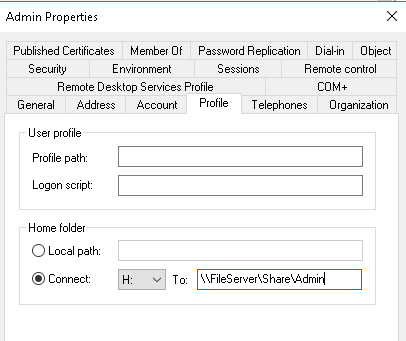
Admin in this case is the name of the user account. Log on to the server that hosts the home folder share. Go to the share and folder location. I recommend using PowerShell, open PowerShell as admin and navigate to that location.

list the folders in a Windows directory using PowerShell, you can use the Get-ChildItem cmdlet. Here’s an example command:
Get-ChildItem -Path "C:\Share" -Directory –Force >C:\temp\listhomefolders.csv Cleanup Step 5) You can now compare CSV output you received in Cleanup Step 1 with output from Cleanup Step 4. The comparison can be done in Excel by opening the CSV files and placing columns of user accounts and their home directories from step 1 with actual existing home directories in Cleanup Step 4. The difference is a list of home folders for user accounts that are no longer in Active Directory. Those can be separated out into a CSV file of its own and deleted as per the next step.
The next step is to delete those home folders for the users who are gone using the spreadsheet you created of home folders belonging to the user accounts that have been previously deleted. In the next example listoffolders.csv is the list of the folders you wish to delete.
#\\Servername\foldernam
$samaccountname = Import-Csv .\listoffolders.csv
foreach ($sam in $samaccountname)
{
$foldername = $sam.samaccountname
Remove-Item -Path \\Servername\HomeFolder\$foldername -Recurse -Force -Confirm:$false
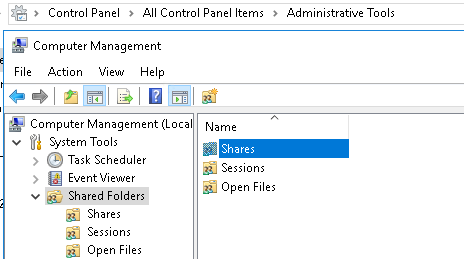
Write-host $foldername}I recommend opening the PowerShell ISE on the file server as admin, this will allow you to tweak the script if you run into errors. If you are not sure how the home folder directory is shared, you can look it up in Computer Management under Shares (Control Panel\All Control Panel Items\Administrative Tools\Computer Management)
If you have enough space on the disk, I would also recommend a move first instead of delete. This way you can look through the content first, before it is purged to be on the safe side.